Wednesday, November 08, 2006
Raku bead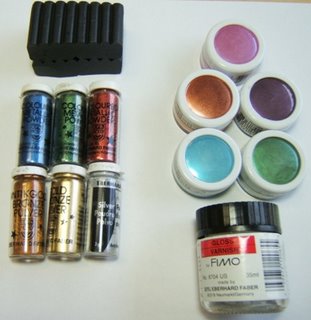
These are basic materials I use to make my Raku (look-alike) beads. First is the black Fimo clay. Black seems to work better than brown or purple.
Second is the Fimo Metallic powder or pulver. The colors are very intense and a little bit of it goes a long way. Third is the Perfect Pearls from Ranger. I use Forever Green, Berry Twist, Turquoise, Forever Violet and Perfect Copper (because I only had $20 at that time I bought them). Each set of powder gives out the different effect. The forth one is the Varnish that I use because you have to put the Varnish on these beads.
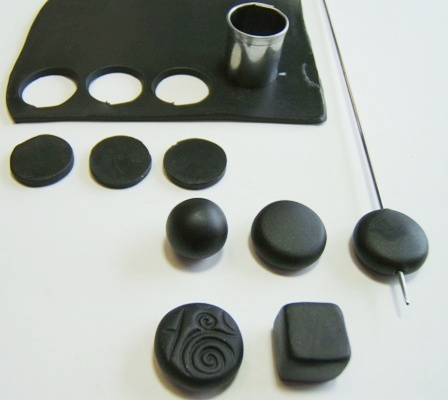
To make the base bead, I use Black Fimo clay, half classic and half soft because the soft is too soft. I roll the clay into the sheet with the pasta machine. With a small, round cookie cutter, I cut out the pieces. This way I will be able to make the same size beads. First, roll it into round shape and flatten it with your fingers. You can stamp the clay, make it into cube or any shape you want. Then poke a hole through it because you do not want to touch these beads as much once the Matellic powder was put on.
Fimo Metallic Powder
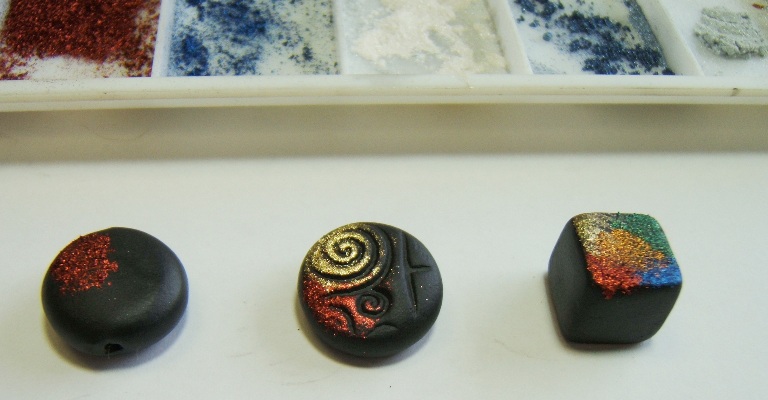 I put the powder on the paint tray. I also mixed 2 colors together to create another color. Red with Blue to make Purple, something like that.
With your finger tip, lightly touch the powder, just enough that you get some on your finger, then touch your finger (with powder) on to the clay, once. Just dabbing, no rubbing or pressing. The clay will grab the powder out of your finger tip. This might take a little practice. Also, do not use brush or q-tip. It will not work with this technique. For example, if you use brush, the powder will get into the groove of the stamped bead. We just try to put it on the surface.
 The first row are the step-by-step pictures of how each powder should be added to the black beads. Be careful to clean your finger after each color and do not put them on top of each other and do not blend (at this point).
 The second row are the beads after ALL the colors were put on, then you can press the powder on to the bead (with your finger tips, do not roll with your palms) and lightly blend. Lightly!
Perfect Pearls

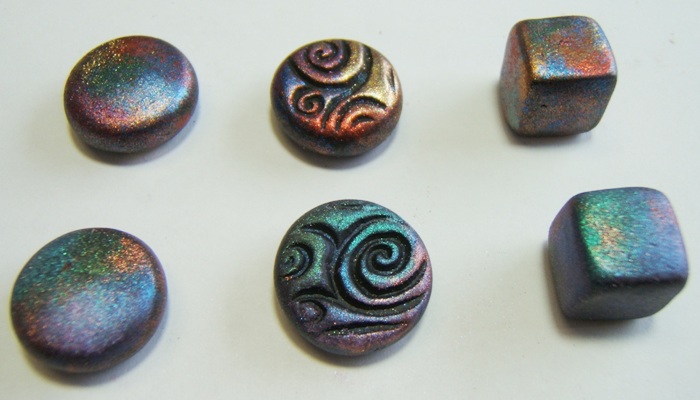
The Perfect Pearls Powder is being used here. The pink (Berry Twist) will change the color to purplelish-blue. I don't know why but it looks really pretty. The Copper color is awesome too. I am sure you will get different effect from different color combination.
The top row are the beads that were covered with FIMO Metallic Powder and the bottom row are the beads that were covered with PERFECT PEARLS from Ranger. These beads can now be baked as usual. Do not burn them or bake them too hot. Bake them outside if you can. The Varnish must be put on after that because the powder stick to the surface of the bead only. It will rub off. I usually do 2 coats.
 These beads can now be baked as usual. Do not burn them or bake them too hot. Bake them outside if you can. The Varnish must be put on after that because the powder stick to the surface of the bead only. It will rub off. I usually do 2 coats.
Subscribe to:
Posts (Atom)