 These beads can now be baked as usual. Do not burn them or bake them too hot. Bake them outside if you can. The Varnish must be put on after that because the powder stick to the surface of the bead only. It will rub off. I usually do 2 coats.
Wednesday, November 08, 2006
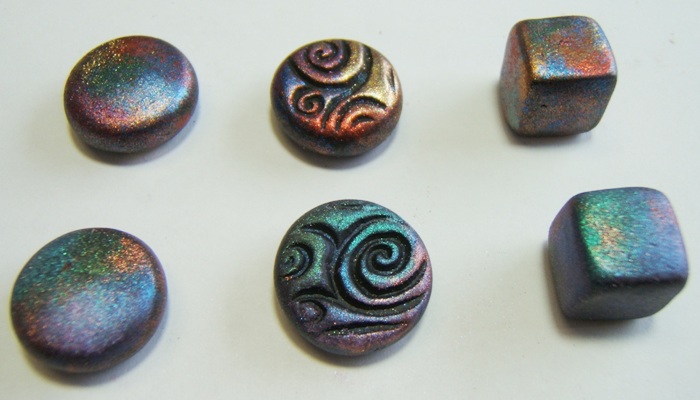
The top row are the beads that were covered with FIMO Metallic Powder and the bottom row are the beads that were covered with PERFECT PEARLS from Ranger. These beads can now be baked as usual. Do not burn them or bake them too hot. Bake them outside if you can. The Varnish must be put on after that because the powder stick to the surface of the bead only. It will rub off. I usually do 2 coats.
These beads can now be baked as usual. Do not burn them or bake them too hot. Bake them outside if you can. The Varnish must be put on after that because the powder stick to the surface of the bead only. It will rub off. I usually do 2 coats.
Subscribe to:
Post Comments (Atom)

22 comments:
Nice Lesson!
Fantastic Lesson.
ive looked at lesson allover the net and this one is the best so far, ive made some pretty beads (my very first that im impressed with) all thanks to you!
please keep up the exellent work, your beads are just stunning
you are now my idol lol
thanks xx
Angie in UK
Pon,
Thank you so much for doing this! It is perfectly clear to me and I am definitely going to give it another try. This is a fantastic idea, Pon, putting up the tutorials for your work, because it is awesome work and now newbies like me can learn from you. You're the best Pon!!
Julia aka ringlets
those look WKD ! can't wait to have a go :D
Wonderful tut!! Can't wait to try this myself now!!! Thanks so much!
I stumbled upon this through goole and I must say... this was JUST what I was looking for!!!! Clear and concise and the pictures were great!!! I can't wait to try it!!!
THANK YOU!!!!
Very, very user-friendly directions. Thanks!
Do you have a fan club? I want to join! If you don't have one yet, maybe I could be President!
Stacey in Australia
(but originally from Indiana!)
This is an excellent tutorial! Thank you for sharing.
Love this one too. Unfortunaly we don´t have Rager ex in Portugal.
Nor pearlex ou anything like that.
Kisses
These are beautiful tutorials. I am especially eager to try your raku methods. Thank you very much.
Becky in Rockport, MA
Wow! I was so excited to see your lessons, I had just bought some clay and really had no clue how to use it to make beads. I was afraid to try, I didn't want to waste it. Now I feel as if I am ready. Thanks so much. Looking forward to any new lessons you have. So easy to understand!
Beautifully written. Great original ideas. Thanks for sharing!
Absolutely Perfect!!! I've looked all over the web and these are easily the BEST directions. I got so excited, I tried it right away...with a twist. I didn't have any of the powders handy BUT I did have some wild color metalic make-up powders that were all the rage in the glam rock erra. {Yes, from the 70's but I've been using them in craft projects ever since.} Guess what? They work perfectly. Thanks for the inspiration! You've found another fan for your club......Onceapona
thanks -- i bet these are even prettier in person than in the photo. it is really hard to get the raku effect right, but you've done it. Your tutorials are much appreciated. You should do some YouTube videos!!
thank you for sharing! I love your work!
these beads look great! thank you once more!
Hey you have a great blog! i found some wonderful ideas here and hope i will be able to try them soon! thank you very muck and keep up the amazing work!
waw, what a luxury claybead.
waw, what a luxury claybead.
All lessons are wonderful--simple and clear.
Thank you so very much, what a wonderful collection of tutorials.
Thank you JoAnn
Wow. I am in love with your tutorials and your work. I do appreciate you taking the time to show how they are done. Excellent and please keep them coming.
Post a Comment